Building a Bento theme for hashnode
A bit of Nostalgia 🖋️
I remember building blogto, it was my first vscode extension by which you can upload, your markdown blog to hashnode.
here is the link of the extension : BlogTo
I was based on old api so, it’s wouldn’t work, time to push some commits.
I use to get a lot of blog ideas while working on projects, but i would keep them in mind and forget them. BlogTo helps to just push a markdown file on hashnode draft pages. So that when i have time on weekend to write in details, i would have the right outliners for the blog. Btw, do you guys write outliners for your blogs?
Also, it was a good integration considering a lot of writers on hashnode are developers. They would spend a lot of time working in vscode.
Well, that was about 3 years ago. A lot has changed. Hashnode has changed.
In the mean time i have written a few blogs. My most viewed blog which gets 40 to 50 views almost every, is only 210 words.
As, you see my thumbnail is really good for that. It’s not a clickbait. People click on it because thumbnail provides them with the exact information that they are looking for. People organically click on the blog post.
Here is the blog title: “Difference between function scope and block scope in javascript ?”
https://blog.coolhead.in/difference-between-function-scope-and-block-scope-in-javascript
Now, you and i can why do people really click on the blog. Title is a question and thumbnail give the solution.Now, let’s come to the another things that i created
WebStories Editor for hashnode blog : Link
Why?
Once google created a blog formate called amp. You would have seen the insta stories formate it’s similar just for web.
Although google does push your webstories. You will get more impression and click, since blogs do get cached on google’s servers.
https://blog.coolhead.in/create-webstories-from-your-hashnode-blog-posts
Let's just way it didn't workout. The web community wasn't really excited about it. Google doesn't really do a good job marketing their projects. Google has a graveyard of project they have [killed](https://killedbygoogle.com/).Webstory is a no-code tool that create code that you can just paste on your site. Also, gives nextjs pages router code as well 🙌🏻.
Creating a Bento Card
Design
You will be familiar with link previews. Link previews help you to show title, description, thumbnail. Twitter has one. There are embeds as well but we will come to that latter.
Code
There are 2 ways in which we can do this with tailwindCSS. Let’s discuss that first.
-
Class Variance Authority - CVA
-
Data Attributes
CVA has become popular mostly because of shadcn/ui using it or maybe we have started using tailwind css more and more.
We have that in vanilla as well.
//For adding class:
document.getElementById("div1").classList.add("classToBeAdded");
//For removing class:
document.getElementById("div1").classList.remove("classToBeRemoved");
CVA solves the same problem:
Creating variants with the “traditional” CSS approach can become an arduous task; manually matching classes to props and manually adding types.
cvaaims to take those pain points away, allowing you to focus on the more fun aspects of UI development.
Data Attributes
Attribute selectors are well supported in almost all browsers. They are great if you are building a library. Tailwind 3.2 added conditional checks for data attributes.
div[data-size="large"] {
  font-size: 2em;
}

div[data-size="medium"] {
  font-size: 1em;
}
Tailwind example :
<!-- Will apply -->
<div data-size="large" class="data-[size=large]:text-lg">
  <!-- ... -->
</div>
<!-- Will not apply -->
<div data-size="medium" class="data-[size=large]:text-lg">
  <!-- ... -->
</div>
Data-attributes can also work as state machine for your animations. They are nicely used in the sonner library for notification building by emil.
Here a video of OG state-machine expert David Khourshid using data-attributes for animations.
Let’s talk about a bit of Requirements:
Here, are the types that a bento card should have
type BentoCardType = "small" | "large" | "medium" | "long" | "vertical";Here is the display of all the bento’s
https://twitter.com/BioMathCode/status/1750568094442139931
here how @[Favourite Jome](@Favourite) blog link looks' like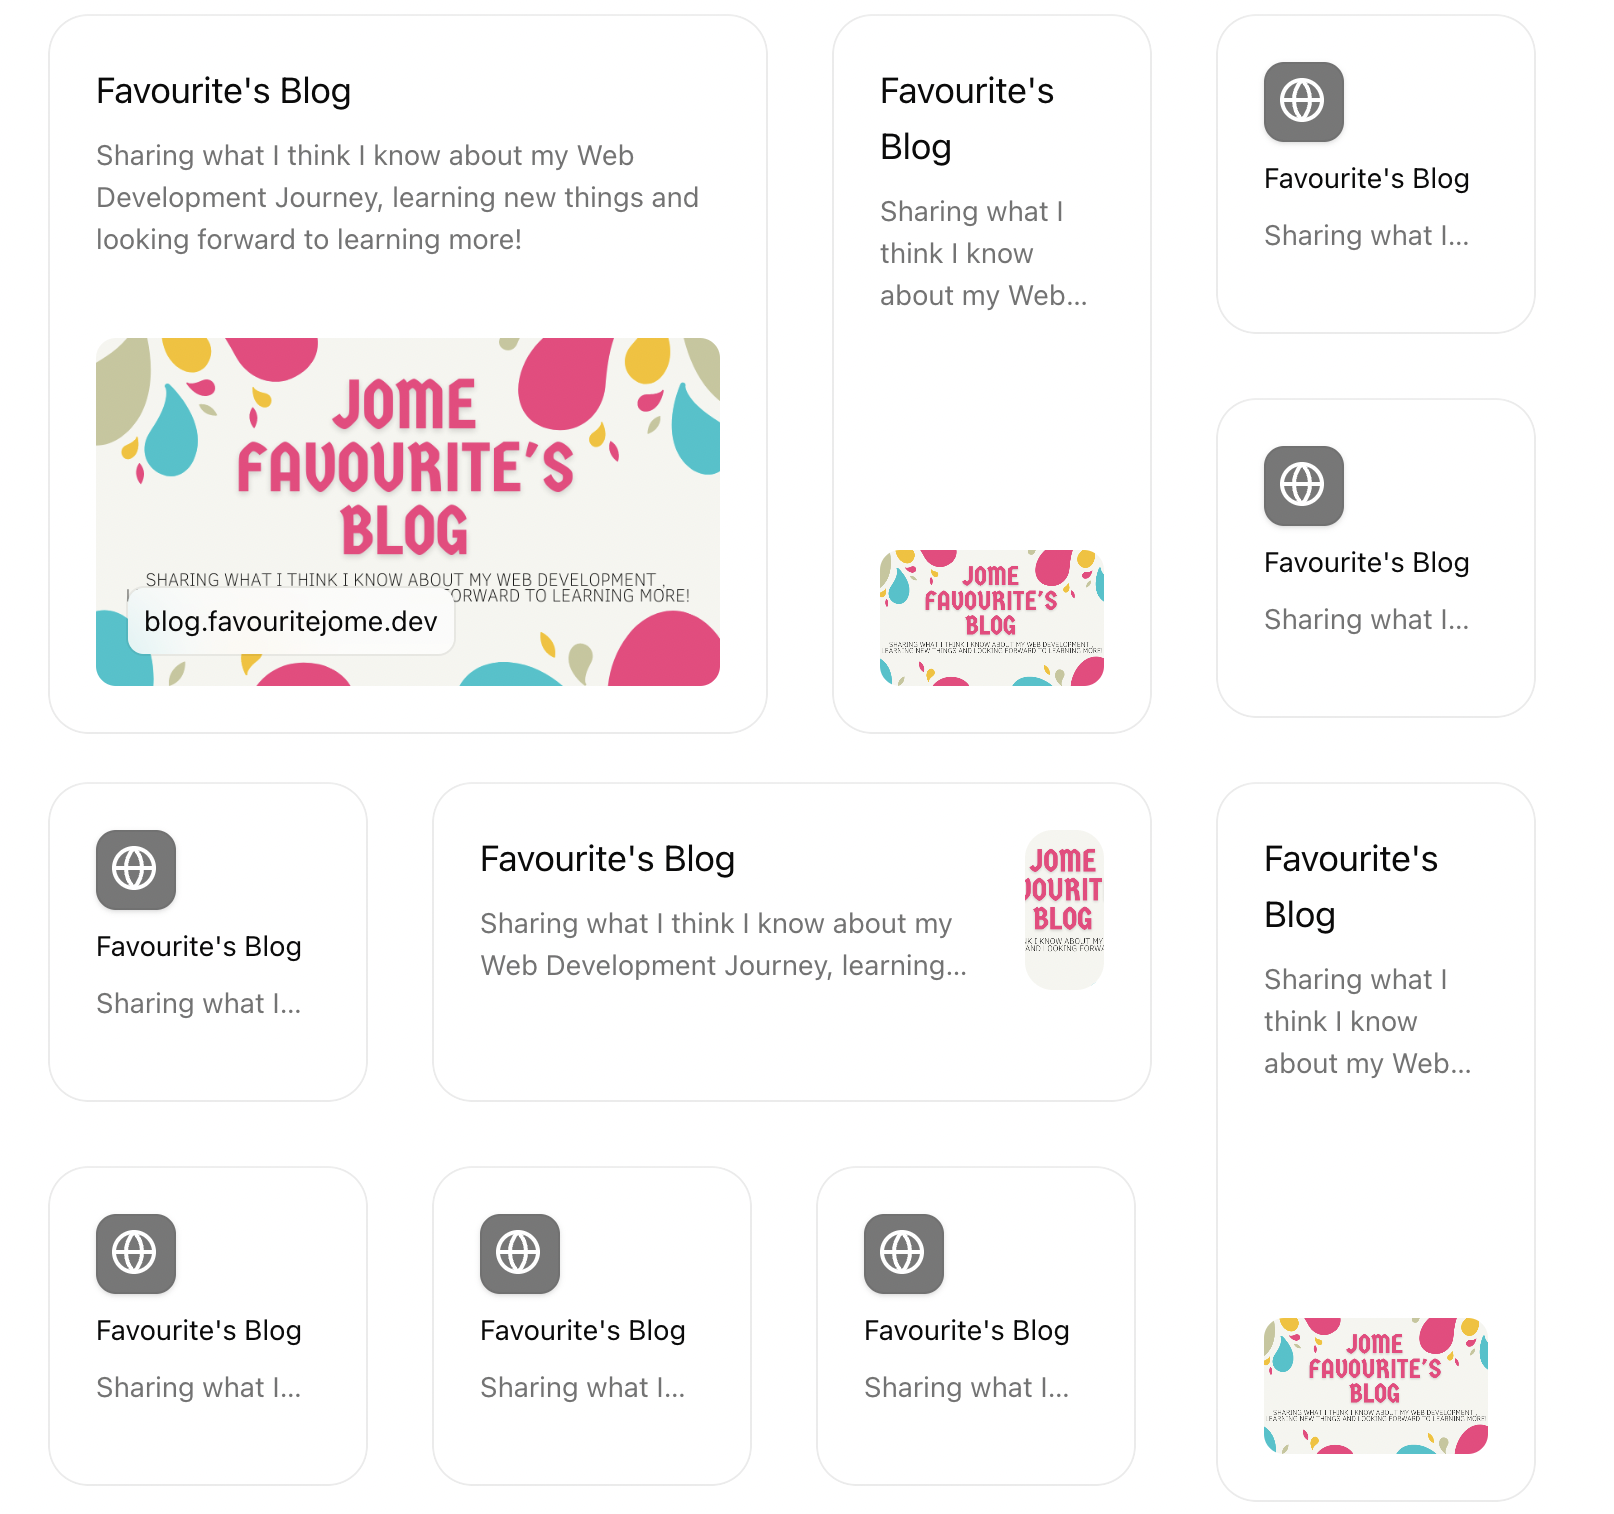
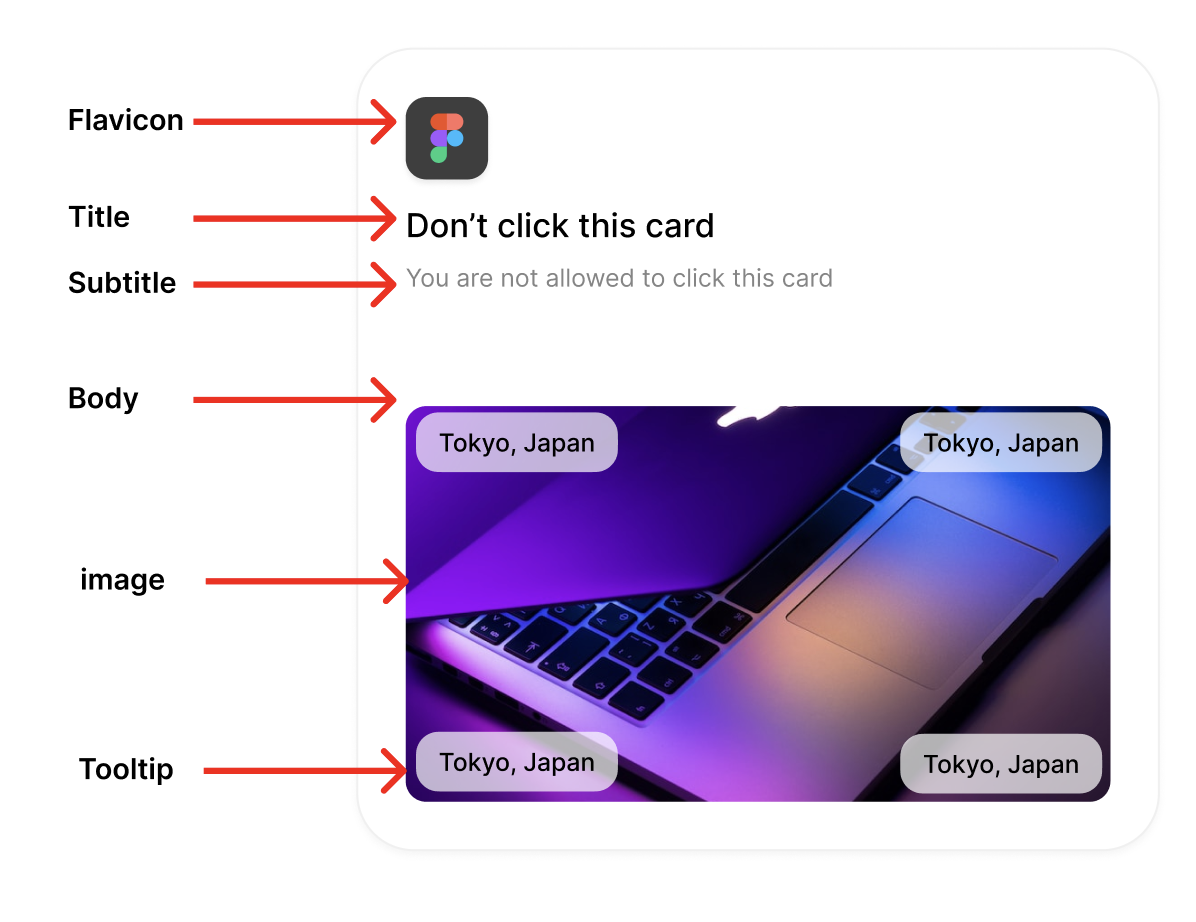
Here How the Link Preview Component Look’s like
async function LinkPreview({ link, type }: linkPreviewType) {
  const url = process.env.VERCEL_URL
    ? `https://${process.env.VERCEL_URL}`
    : "http://localhost:3000";
  const res = await fetch(`${url}/api/linkpreview?link=${link}`);

  const data = await res.json();
  return (
    <BentoCard type={type}>
      <BentoContainer type={type}>
        <div className="flex flex-col gap-2">
          <BentoFlavicon icon="website" type={type} />
          <BentoTitle type={type}>{data?.title}</BentoTitle>
          <BentoSubtitle type={type}>{data?.description}</BentoSubtitle>
        </div>
        <BentoImage type={type} alt={data?.description} src={data?.ogImage}>
          <BentoToolTip type={type}>
            {link.replace("https://", "")}
          </BentoToolTip>
        </BentoImage>
      </BentoContainer>
      <BentoLink href={link} />
    </BentoCard>
  );
}
A Bit about Pattern:
I was inspired by Excalidraw blog, in which they got rid of render props from Excalidraw components. Also, the Compound Pattern in react is really better than props.
I used data-attribute to create a single bento component to display link previews.
Create an API route for link-preview in nextjs
We use cheerio to get the title, description, ogImage, and Favicon
// pages/api/link-preview.js

import { load } from "cheerio";
import fetch from "node-fetch";

export async function GET(req: Request) {
  const { searchParams } = new URL(req.url);
  const link = searchParams.get("link");

  if (!link) {
    return Response.json({ error: "No link provided" });
  }

  const decodedUrl = decodeURIComponent(link).toString();

  try {
    // Fetch HTML content of the page
    const response = await fetch(decodedUrl);
    const html = await response.text();

    // Use Cheerio to parse HTML
    const $ = load(html);

    // Extract relevant information
    const title = $("head title").text().trim();
    const favicon =
      $('head link[rel="icon"]').attr("href") ||
      $('head link[rel="shortcut icon"]').attr("href");
    const description = $('head meta[name="description"]').attr("content");
    const ogImage = $('head meta[property="og:image"]').attr("content");

    // Return the link preview data
    return Response.json({ title, favicon, description, ogImage });
  } catch (error) {
    console.error("Error fetching link preview:", error);
    return Response.json({ error: "Internal Server Error" });
  }
}
Introducing HMU: Hit Me Up
Hit Me Up is a portfolio template for bloggers, indie developer, anyone who is on internet and wants to write and sell goods. The aim is to be composable, adaptable and plug&play.
Hmu => Link🏝️ + Hashnode + LemonSqueezy
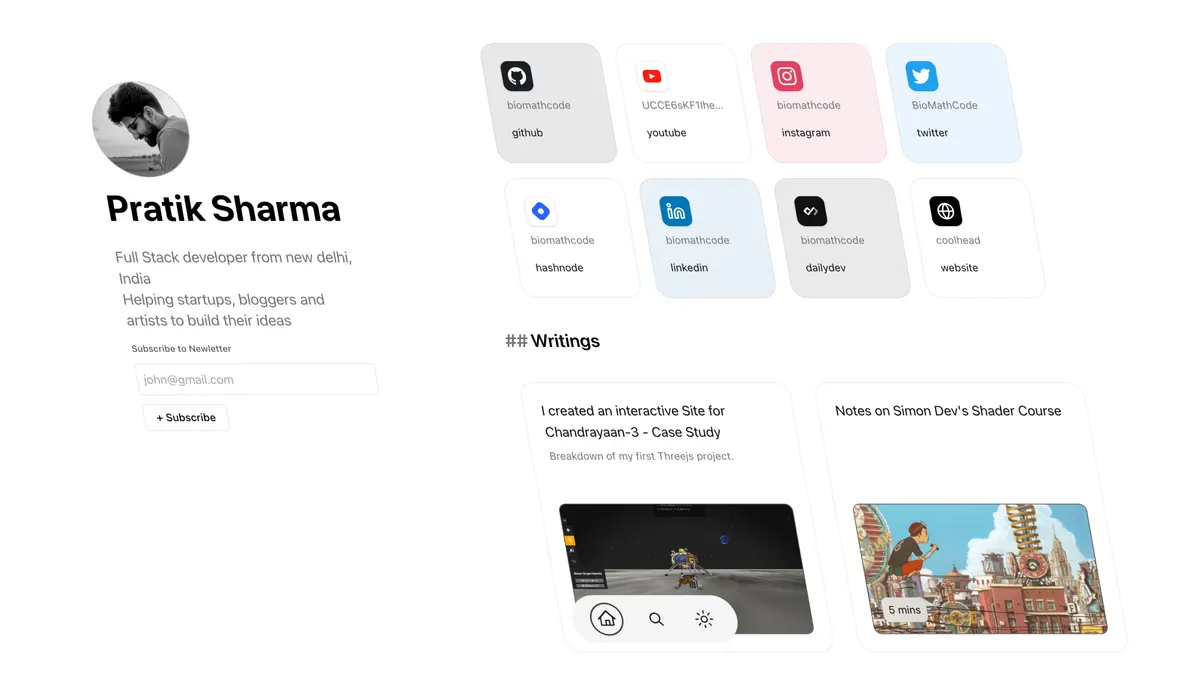
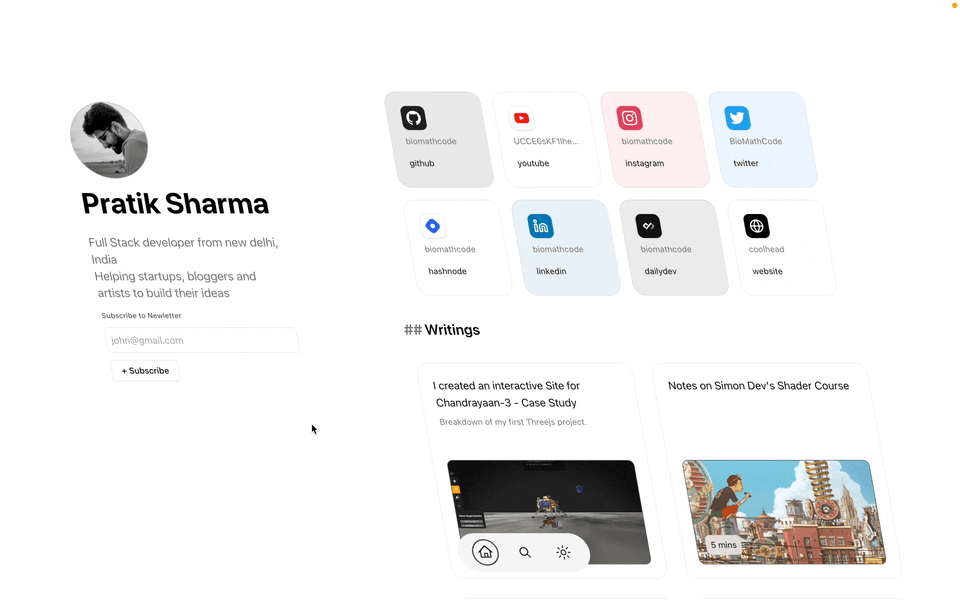
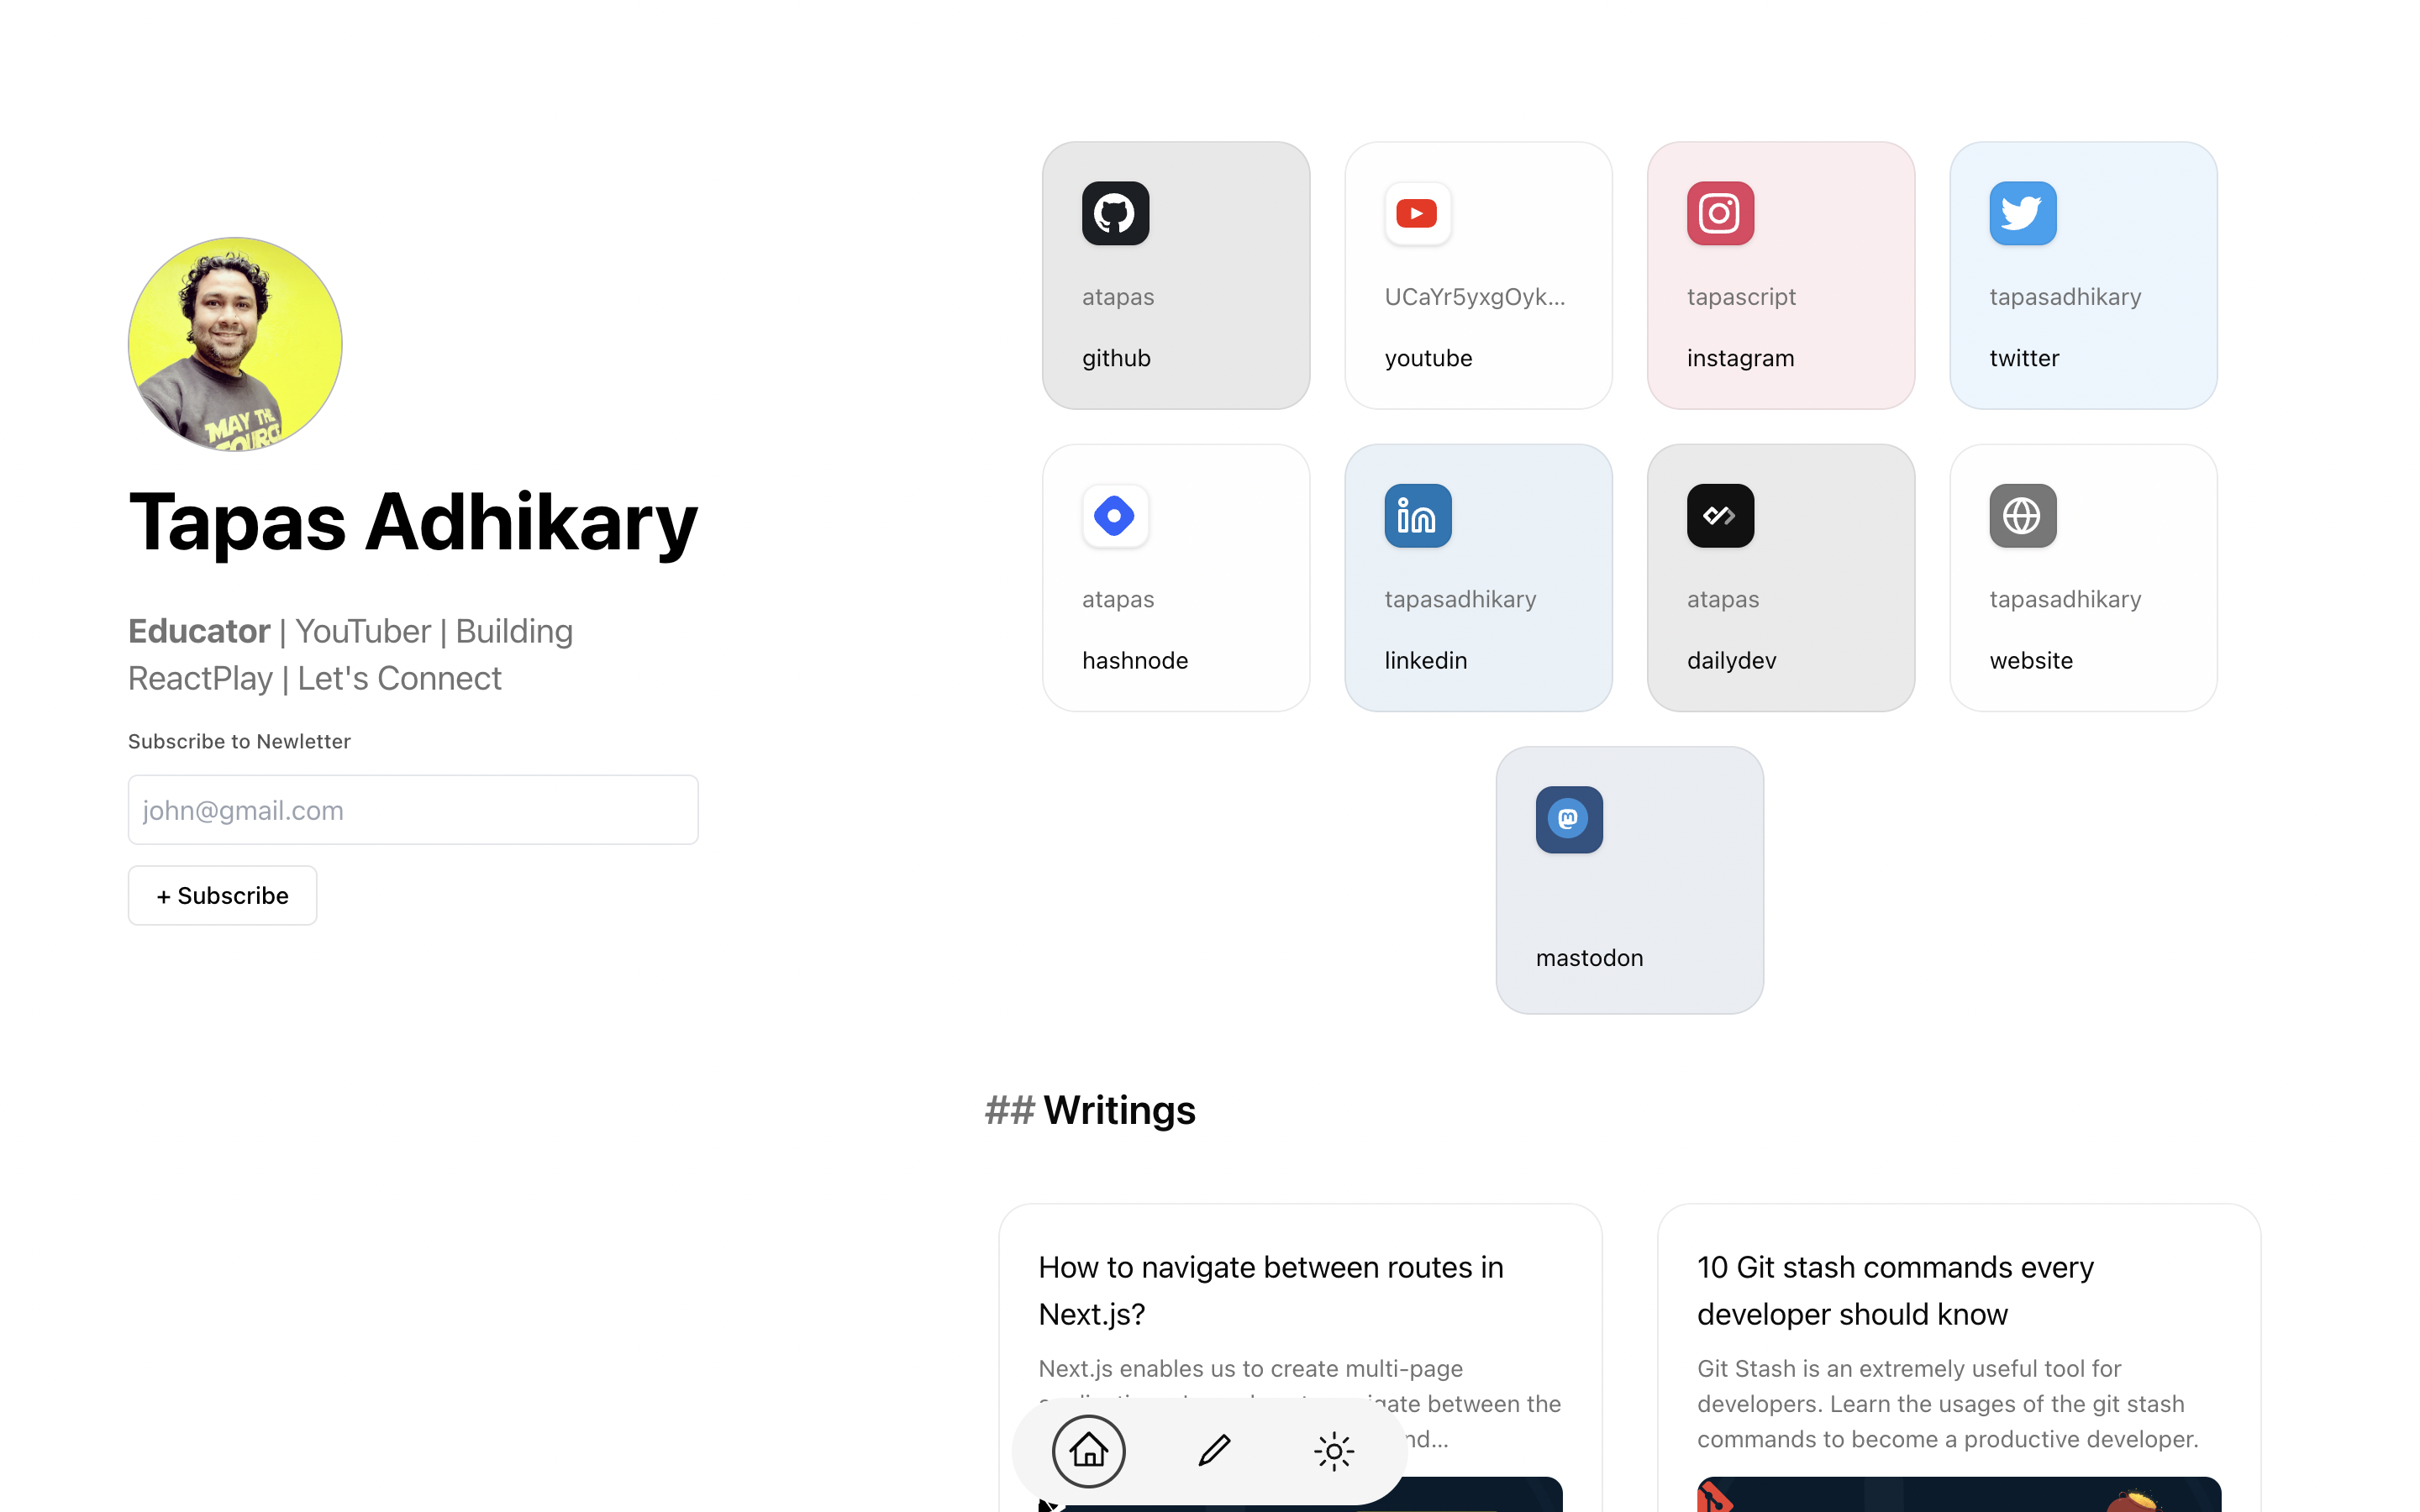
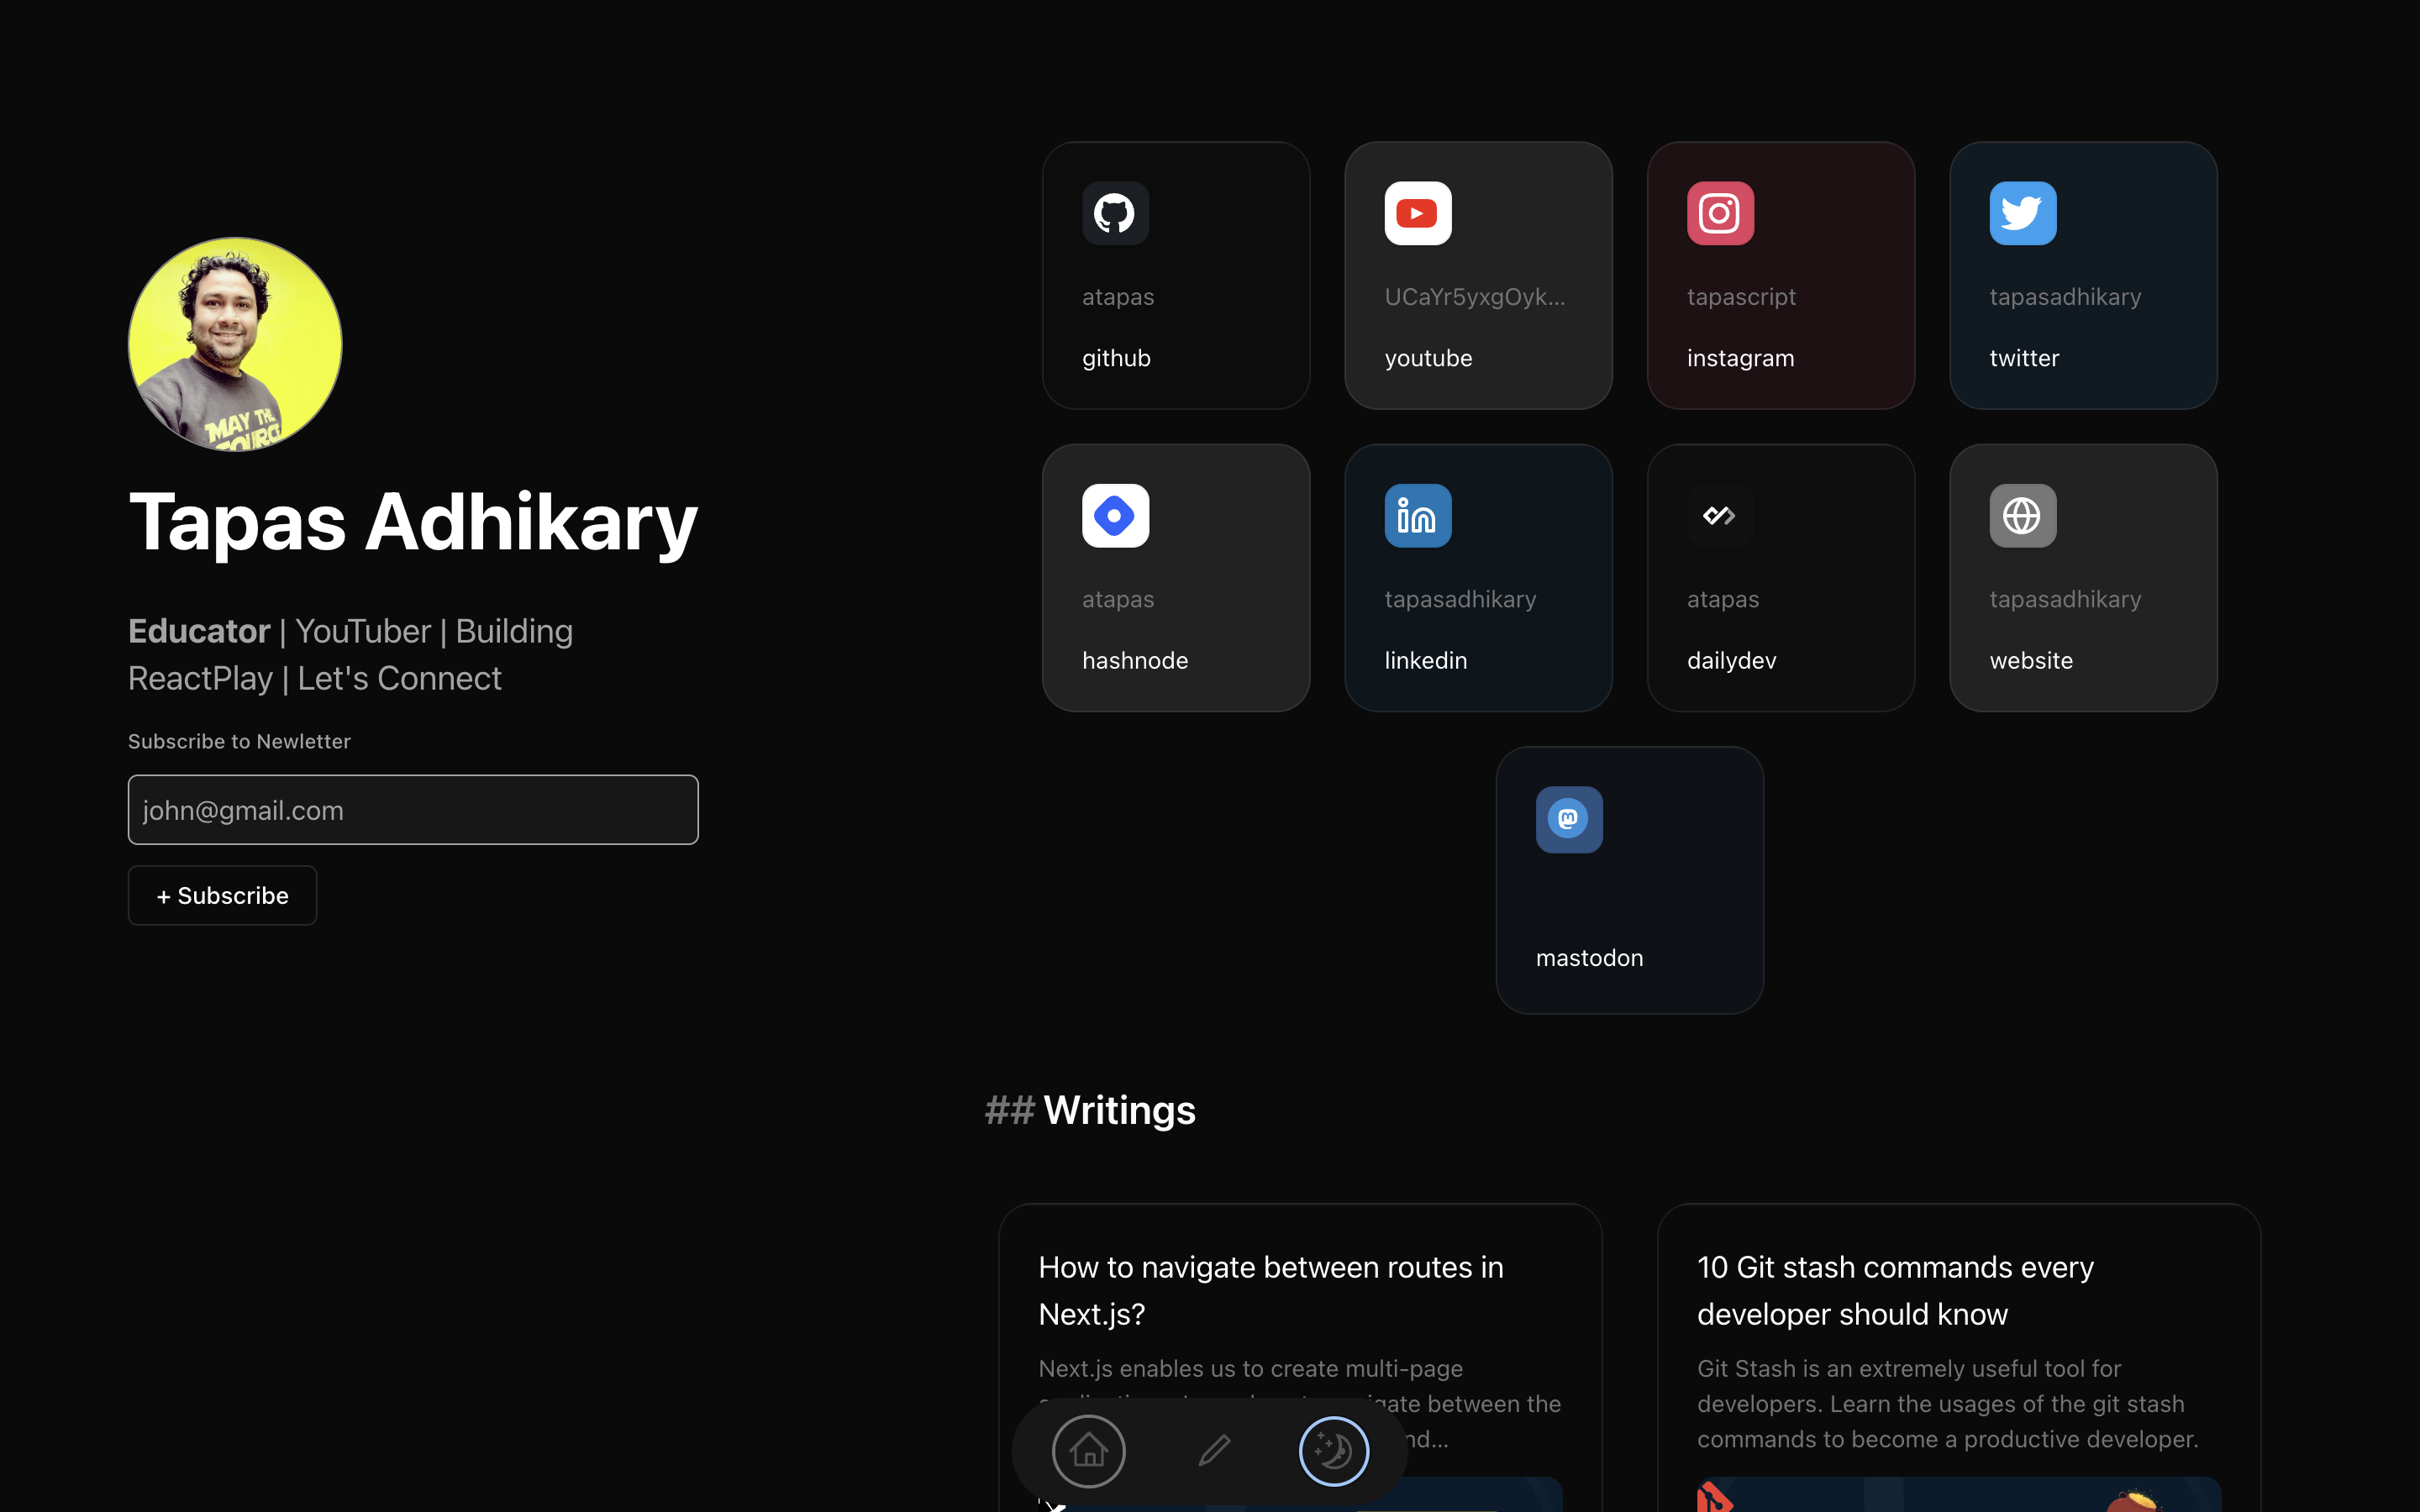
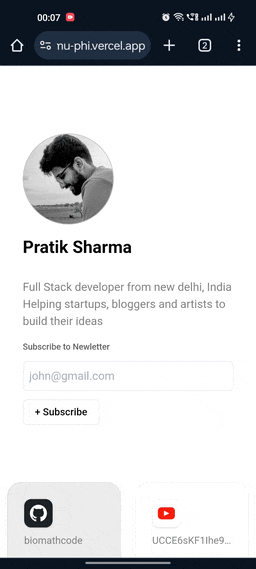
Here’s how hmu template would look like for @Tapas Adhikary Blog:
Light Mode:
Dark Mode:
Mobile display:
Subscribe to Newsletter:
A simple Subscribe box that will send request to hashnode , as well as lemon squeezy. You can send blog newsletter from hashnode and send marketing newsletter with Lemon Squeezy Email Marketing.
Why use HMU ?
I have three reasons for you
-
Composable Design**:**
- “Craft your unique online identity effortlessly with HMU’s portfolio template. I understand the importance of personalization, which is why I’ve designed it with a composable structure. Tailor your online presence using modular components, arranging and showcasing content in a way that perfectly reflects your individual style.”
-
Adaptable to Varied Users**:**
- “Whether you’re a passionate blogger, an indie developer bringing innovative ideas to life, or an individual eager to showcase and sell your products online, HMU has you covered. I’ve created this template with flexibility in mind, ensuring it caters to the diverse needs and business models of all users.”
-
Plug & Play Functionality**:**
- “I know your time is valuable, and setting up your online space should be a breeze. The plug-and-play functionality eliminates the headaches of complex configurations, letting you focus on what matters most – creating content and promoting your products.”
One Last Things - AI
Update your blogs with ai. Drop your OpenAI key in the environment variables. It is similar to notion ai.
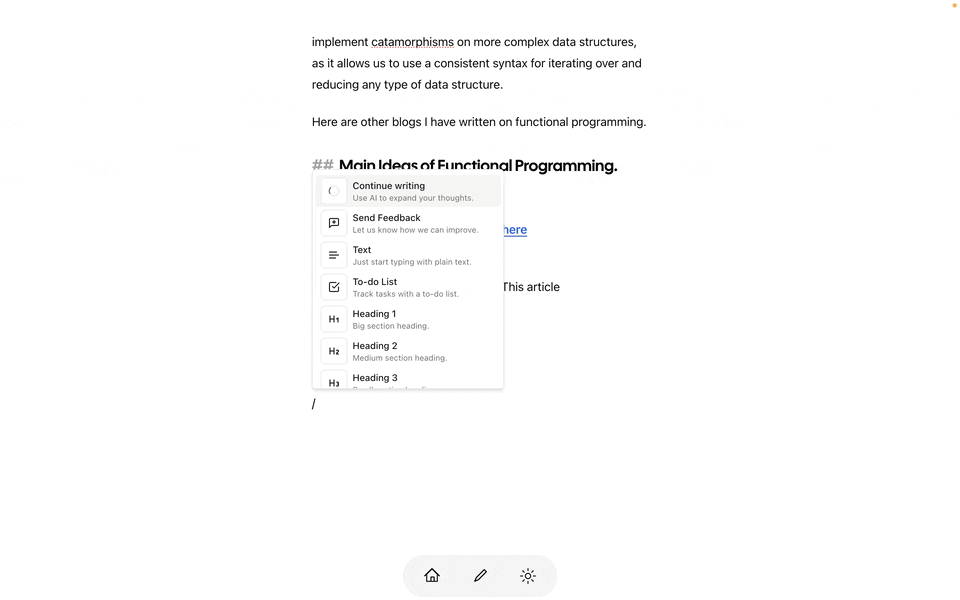
I used novel.sh editor it have nice capabilities to edit your blog. I am adding support for ollama.ai. So that you can freely use ai at localhost:3000 and update your hashnode blogs.
All the other features that starter kit provide : Seo, page Og Image generation, Code highlight, responsive blog pages.
Github Repo: